
Welcome to part two of the custom dress form making. In part one, I talked about how to make the plaster cast mould. In part two, we’re getting down to foamy business and talk about how to prepare the mould and fill it, resulting in a mannequin in your exact shape, that will become your best buddy for fitting your own projects.
A word of caution: this is not a proper tutorial, as I didn’t take enough pictures in the making process, but it will give you a fairly accurate idea of what it entails. And it’s very wordy, as I tried to be as detailed and specific as possible.
Also, think twice before starting this, as it’s really really messy, and I fainted twice while making the cast (though I now have really great tips on how to avoid this). Please get in touch if you have any questions, though I have a feeling this might put people off ever going anywhere near this. If you want to read about what made me decide to do one, have a look at this post.
DIY Dress Form – Inspiration
Sew, not work post – the main source of inspiration
Joost’s men version – probably the best but unfortunately, I found this after I had done mine
Youtube body casting video (careful, it involves a naked lady being wrapped up in plaster)
Jezebel blog
The Amazing Mrs. O
Googling Diva
Two girls and a pin
DIY Dress Form – Process summary
- Gather the required materials
- Cover the inside of the mould with release agent
- Join the two mould parts together
- Mix and pour the foam
- Take the mould out.
DIY Dress Form – Materials

– 2 part polyurethane foam – I used a type of foam used for boats, the 2 kg version (you will get 2 tubs that need mixing – please read the instructions carefully). I used absolutely all of it, so you need to have a think depending on your body size, if you might need more. I am 1,72 (5.6) and about 63 kgs.
– Release agent – you will need to liberally douse the inside of the cast with this, otherwise you will never get the foam out, it’s incredibly sticky. I used Polyvinyl Alcohol PVA from the same company, but I can’t say I was too pleased with it. If you know anyone who does moulding, ask what the better option could be. I have also tried the release wax for the first attempt, maybe a combination of the both could do the trick.
– 2 measuring jugs – you really need two separate ones. If the two parts of the foam come into contact, all hell breaks loose and you might as well throw out the jugs
– Another recipient to mix the foam in, I used a plastic bowl that I had to throw away afterwards
– A spatula, wooden spoon, stick or anything to mix the foam with. Even better if you have an electric paint mixer.
– Staple gun or upholstery needle and thread; I ended up using heavy duty duct tape on top of the staples
– An old paintbrush for the release agent, and a paint tray, plate bowl or anything else to put the release agent in, it’s very liquid.
2. Release agent

You will need to douse the inside of each of the two halves very liberally with the release agent of your choice. The main idea is to make the porous plaster smooth and non-permeable, so that the foam, which is incredibly sticky, cannot get into the plaster and make life really hard for you when releasing it. In the Youtube body casting video (careful, it involves a naked lady being wrapped up in plaster) I mentioned before, they use this substance which I could not find in the UK, but the foam seems to come out very easily. That was definitely not my experience, it was hell to take it out, so maybe the release agent wasn’t the right one.
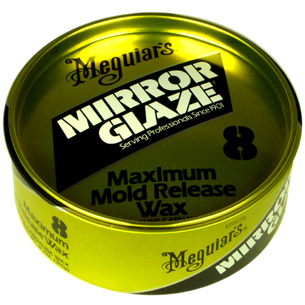
Anyhow, what I did do was to apply the liquid PVA alcohol with a paintbrush in every nook and cranny of the mould. You will see that the plaster is ‘drinking’ the PVA as soon as it’s brushed over. Then let it dry and apply again. And repeat. And repeat again if you have enough PVA alcohol. The surface should come out very blue and shiny and feel smooth to the touch.If you have release wax, you can use it as well. I melted mine in hot water (or you can also try the microwave on a really low temperature – TAKE IT OUT OF METAL BOX FIRST). You can either rub it on or if it’s liquid, brush it on. This will take a bit longer to dry. I left it another day to dry until it was ready to be filled.
In the meantime, I have seen another option: use vaseline as a release agent. The mould will come out a bit greasy, but that can be cleaned or you can wrap the dummy in cling film.
3. Putting the cast back together
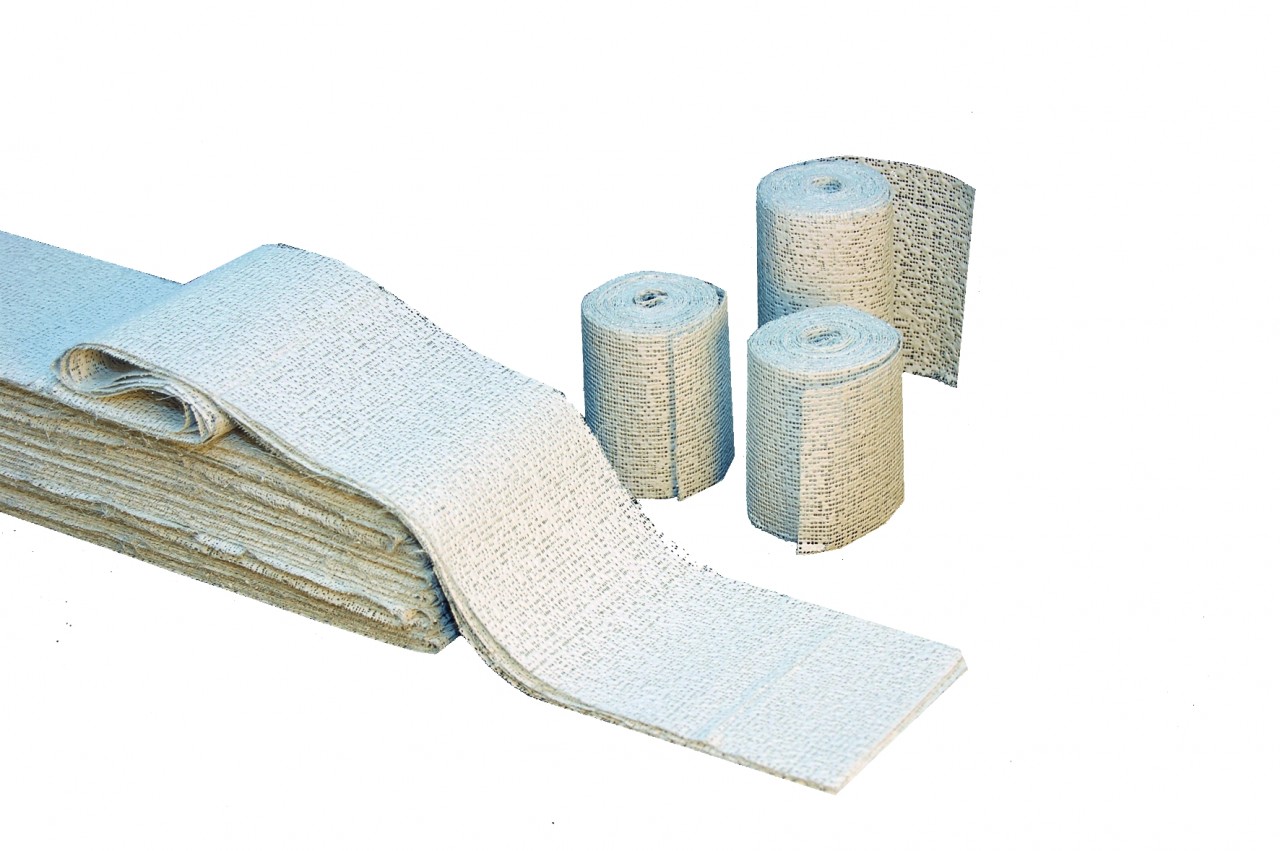
Matching the marker signs, join the two sides together as accurately as possible. Then either staple the two halves together or sew them with the upholstery needle and thread. I stapled the halves, then secured with heavy duty duct tape. I then put plaster of Paris tapes using a similar process to when you did the cast, i.e. soak in water, over the joining, smoothing it all out very carefully. You need to make sure you use three layers or more of tape, to that the joining is nice and secure at it will not let foam out or crack under pressure.
You will then have to cover the neckline and armholes with more plaster tapes, again, making sure no foam will be able to escape. You will need to apply PVA to the hardened neckline and armholes plaster strips, to make sure the foam will not stick to them either.
The mould will look like a full torso again, with the neck hole and armholes covered as well.
4. Pouring the foam
Once the cast is dry again, including the strips at the neckline and armholes, turn it upside down in a stable position. I used a deep and narrow cardboard box and it seemed to do the trick. Make sure the floor is covered well, that foam is dead sticky and won’t come off with anything.
Start mixing Foam part A with foam part B. Please, do read the instructions carefully and watch a few Youtube videos too, so you know what to expect. The foaming process is very intense and once started, it will not stop under any circumstances.
Very important: mix exact quantities of each component. Make sure the room temperature is a specified, this will affect how much foam will result. If at all possible, make sure the cast is warm (if you stored it outside during the winter, bring it in a day before). Mix really well, as that also affects the amount of foam resulting. Use small quantities at a time, 250ml + 250ml, as you don’t know how much foam will result inside the mould.
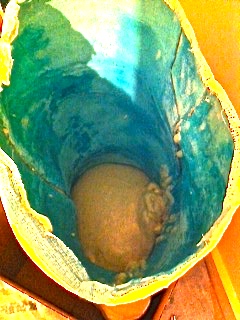
This is my mould with 250ml+250ml poured in. The blue stuff is the release agent and you can see a bit of the cardboard box at the bottom.
After the foam has been poured, shake the mould a bit to make sure it gets into all nooks and crannies while it’s still fairly liquid.
Wait for the foam to stop expanding and allow around 15 mins between pouring each batch. If necessary, the last batch might have to be smaller, so it does not overspill.
Once all cast is filled, leave the mould and cast in the box for at least 24h. I left mine for almost a week, as I didn’t get around to taking it out.
5. Taking the foam core out of the mould
This was actually the hardest part of the entire process. My release agent totally failed, so my foam core was stuck to the plaster, and I mean really really stuck. So I had to figure out what could help take the hardened plaster off my foam mould. Which I, of course, googled! It turns out that your common, garden-variety baking soda is actually plaster of Paris Kryptonite. So all you need to do is soak the cast in water in which you dissolved the baking soda.
I used my bathtub and soaked the entire mould in on both sides until the layers started peeling off. And with a lot of elbow grease, I managed to take out the foam. There were some places where the plaster wouldn’t come off, so I had to cut it off in a very thin layer.
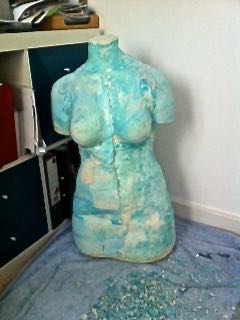
Anyhow. I finally managed to get all the plaster off the foam, and then sanded it all down to make sure it’s nice and even.
Here’s what the end result looked like before it got ‘dressed’ in its cover. See the little chips on the floor? I shaved them all off with a craft knife to make sure there are no plaster pieces left. I would like to advise last year me to purchase a power sander now!!
The bottom will not be very even because the foam did not come out of the mould very evenly. So you will have to cut it out (I used a bread knife) and try to achieve an even base.
And you now have a foam core that is very close to becoming an amazing custom made form.
For the base, I’ve used an old floor lamp that I got for free from Freecycle The base is very heavy and the pole is straight, so it made a perfect stand.

Some tutorials say to insert the pole into the foam while it’s still soft. But I wasn’t sure it will work out very well, so didn’t want to waste the stand. I ended up hack sawing the pole to a length that would ensure the dummy would end up a similar height to mine. I measured the middle of the base and drilled a hole about 10 cm deep. Then I enlarged it so that the end of the pole would fit in it. I had to wedge a few pieces of foam and secure with super glue, to make sure it stays perfectly straight.
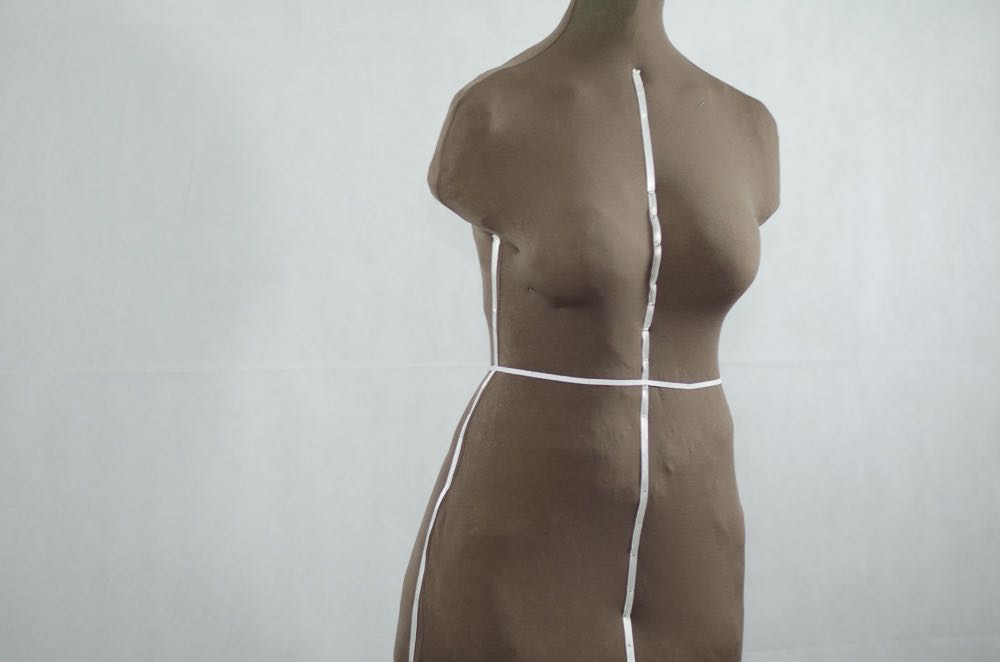
I then made a cover out of some 4-way stretch fabric I had in my stash and then pinned some thin tape with dressmaking pins to help me with the fitting. Because the dummy is so easy to pin into, the pins go so deep they are almost invisible. The cover stretched to perfection, so the surface is very smooth.
Here is the end result, side and back view, and myself next to it for comparison.


Please feel free to ask any questions, I would be happy to assist you if you’d like to give this a go.
If you found this useful, please take a second to pin on Pinterest so that others can discover it as well.
Happy DIY-ing!
ENJOYED THIS POST?


That is amazing, great job!